Instruction User Manual of DEDAKJ Oxygen Concentrator of DE-2SW
DEDAKJ
Instruction Manual of Household Oxygen Concentrator

CONTENTS
Safety Precautions
Working Principle
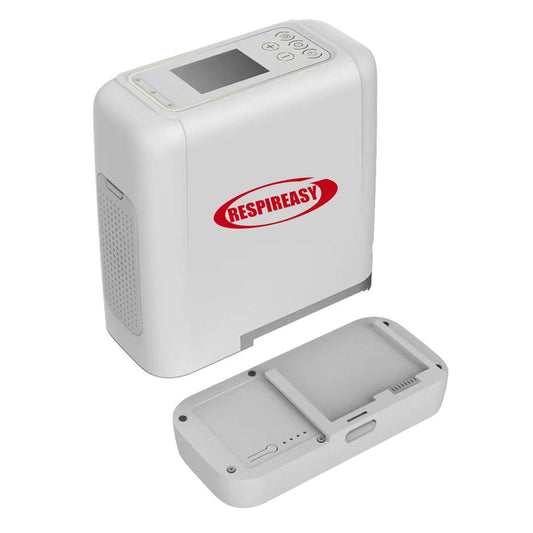
Product Description
List of Accessories
Main Technical Indexes
Appearance Diagram
Steps of Use
Panel Display/Operating Instructions
Instructions for Use of Remote Control
Characteristic Function
Maintenance
Faults & Troubleshooting
Safety Precautions
WARNING
The device is not a medical device, so it is not considered for life support or life extension!
▲The machine shall be placed in an indoor ventilated place and protected from direct sunlight, and the distance from it to walls and other objects shall be more than 30CM/12In.
▲Please do not place any foreign matters or liquid containers on the chassis.
▲It is forbidden to stack sundries at the side air inlet and the back air hole of the machine, so as to prevent the high temperature caused by the blockage of air inlet and exhaust, which may cause shutdown or decrease of oxygen concentration.
▲To avoid interference of the machine by strong electromagnetic environment or interference of other electrical appliances, please keep a distance of at least 3m/120In between the machine and other household appliance
▲It’s not allowed to place the machine upside down or horizontally.
▲If the power supply voltage is unstable and exceeds the normal voltage range of 15V, please connect the voltage regulator before use.
▲Please select safe and acceptable socket and wiring board certified by China Commission for Conformity Certification of Electric Equipment (CCEE)
▲Oxygen is combustion-supporting gas. Do not smoke, and keep away from the fire source to avoid fire hazard.
▲Do not start or stop the machine frequently, and please start the machine 3~5min after shutdown, so as to avoid affecting the service life of the compressor.
▲Do not apply oil or grease on any part of the oxygen machine.
▲Do not use the oxygen machine without air filter.
▲When using the oxygen machine, avoid bending the oxygen inhalation tube,or water will overflow from the water tank.
▲Unauthorized personnel are not allowed to disassemble the cover.
Working Principle
Air enters the compressor after filtered by the air inlet filter and is compressed into molecular sieve tower for separation of oxygen gas and nitrogen gas. Then, oxygen gas passes through the molecular sieve tower and enters the fine sieve tower smoothly, while nitrogen gas is discharged into the atmosphere through the separating valve after adsorbed by the molecular sieve. After the concentration of oxygen gas is further increased in the fine sieve tower, the flow rate is controlled by the flow control valve, and then oxygen gas is wet through the humidification water tank and finally flows through the oxygen delivery pipe for supplementary oxygen inhalation by users.
 Schematic Diagram of Oxygen Machine
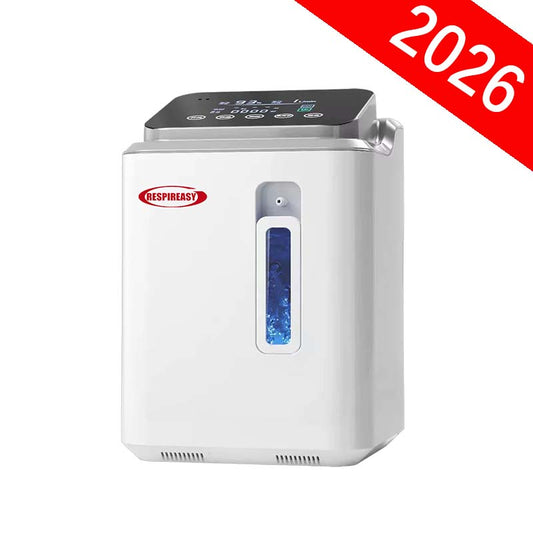
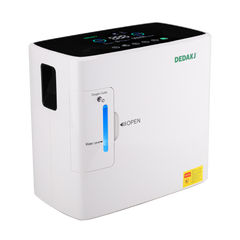
Product Description
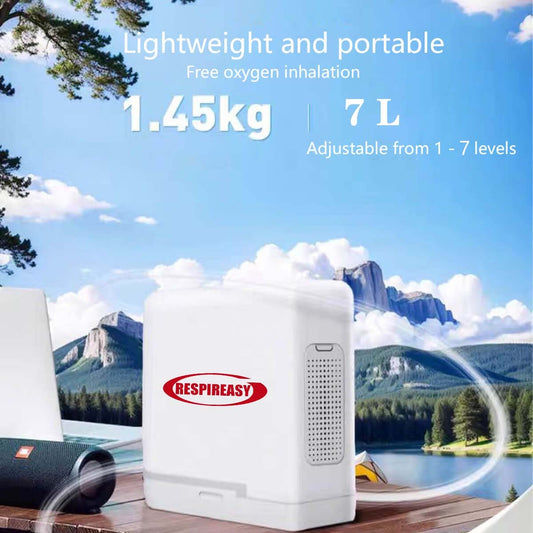
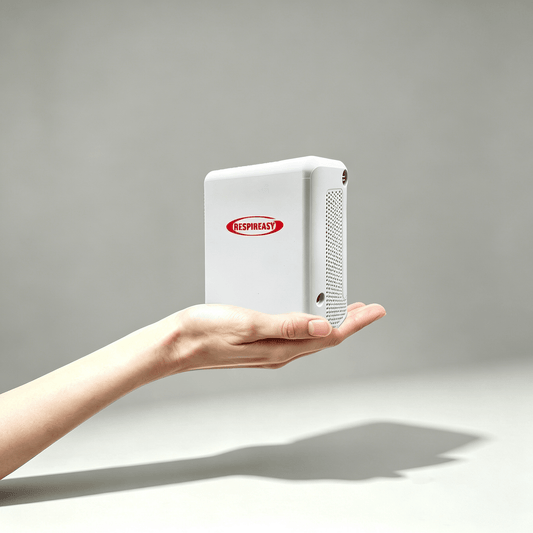
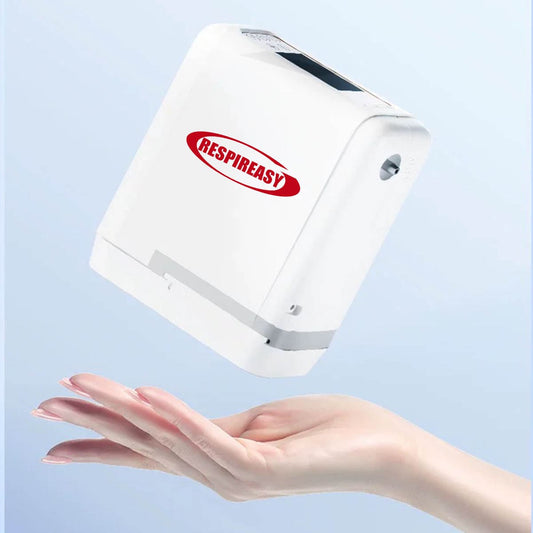
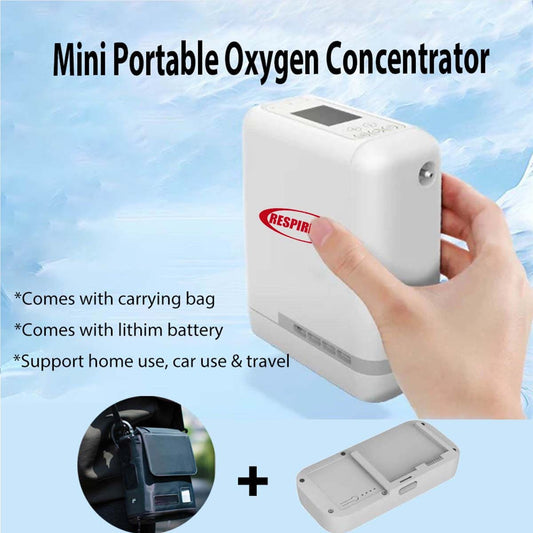
This product adopts AC 220V (110V) voltage as power source, air as raw material, as well as pure copper oil-free compressor and imported high-quality molecular sieve with original packaging, so as to produce high-purity oxygen gas for supplementary oxygen for domestic use by a new Pressure Swing Adsorption (PSA) method under normal temperature. This product is designed as per the standard higher than that for house hold appliances and equipped with large and clear LED, intelligent chip automatic control circuit and automatic fault alarm function. It is easy tooperate and provided with timing and overheat protection circuit. When the working temperature of the compressor is too high, it will stop working automatically to better protect the safety of the compressor and the whole machine. Moreover, this product is light and handy and easy to move, and it is suitable for not only household use but also vehicle-mounted use through the automotive power supply. It is suitable for the majority of supplementary oxygen and oxygen users.
List of Accessories
Host machine X1
Parts used for atomizing (limited to DE-2SW) X1
Oxygen inhaler set X1
Remote control X1
Instruction Manual X1
Quick Use Manual X1
Quality Certificate (attached to the Instruction Manual) X1
Power line X1
After unpacking, first check whether the appearance of the product is intact, and then check the items in the package one by one according to the Table above. For any missing items, please contact the dealer for replacement in time.
Main Technical Indexes
Product name: Household Oxygen Concentrator
Model: DE-1S/DE-1SW/DE-2S/DE-2SW
Oxygen production method: PSA method
Rated voltage: AC220V/50Hz (AC110V/60Hz)
Input power: 120VA(DE-1 S/DE-1 SW)200VA(DE-2S/DE-2SW)
Oxygen flow: 1 -8L(DE-1 S) 2-9L(DE-2SW)/min, adjustable
Oxygen concentration: 30-90%
Atomizing rate: >0.2mUmin(limited to DE-1 SW/DE-2SW)
Oxygen outlet pressure: 20-70KPa
Carbon dioxide: pass the test by the specified method
Carbon monoxide: pass the test by the specified method pH value: pass the test by the specified method
Shape identification: colorless odorless gas, with combustion supporting property
Negative oxygen ion: ≥ 8,000,000/cm3
Speaker: 0.5W
Timing for work: up to 180min
Running noise: ≤ 45dB (A weighted)
Electrical classification: Class II
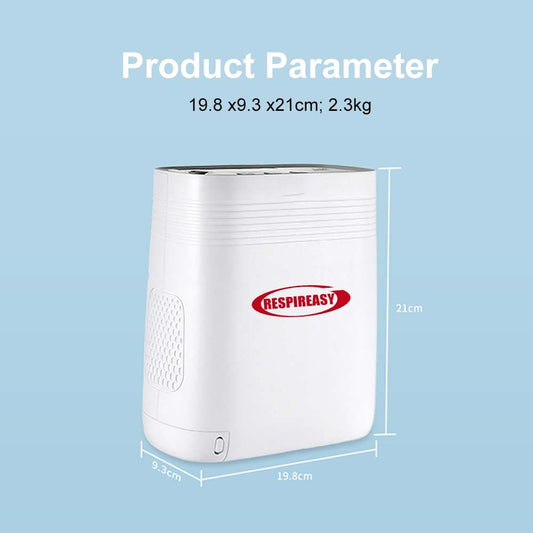
Product dimensions: 350mmxl91 mmx315mm
Net weight: 6.7kg(DE-1 S) 7.2kg(DE-2SW)
Normal working conditions
Ambient temperature range: 5°C~40°C Relative humidity range: £80%RH Atmospheric pressure range: 86kPa-106kPa
*When the temperature is lower than 5°C, the equipment shall be placed under normal working conditions for more than four hours before start-up for use.
Transportation & storage conditions
Ambient temperature range: -20°C~60°C Relative humidity range: <93%RH
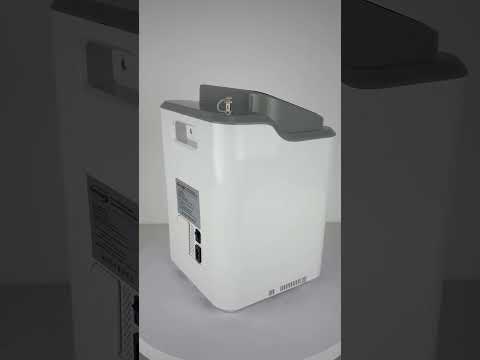
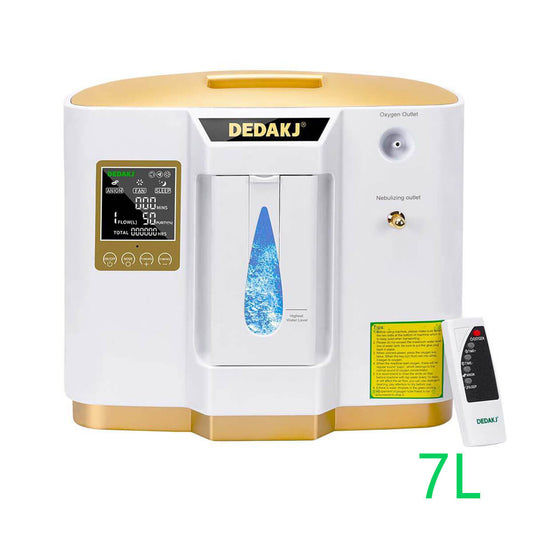
Appearance Diagram


Steps of Use
① Drainage of water tank
Drain the water tank as shown in the Figure on the left.
② Water injection
Open the rubber plug on the top of the water tank and inject pure water (cold boiled water or distilled water) to below the highest water level, then install the rubber plug of water tank back to its original position (remember to install the rubber plug of water tank back to the original position, so as to avoid no oxygen output from the oxygen outlet during normal operation of the machine due to oxygen leakage from the water filling port).
Then, align the humidification water tank with the outle of the oxyge machine water tank, align it with the bottom clamping slot, and install the humidificatio water tank bac to its original position
※It should not be higher than the highest water level. Water injection is not necessary, and it is only for humidifying oxygen gas. You may not inject water if you don't think the oxygen is dry.
④ Connect the power line
As shown in the Figure on the left, insert the output end of the power line into the power socket of the oxygen machine, and then insert the other end of the power line into the socket.
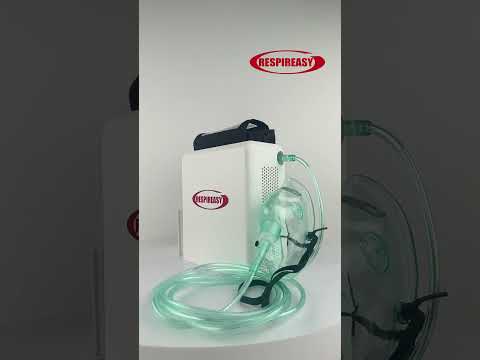
⑤Connect the oxygen inhalation tube
Insert the large-diameter end of the oxygen inhalation tube into the "oxygen outlet" of thehost engine.
※ If there are too many water drops in the water collector during or after oxygen inhalation, please open the water collector and pour out water.
⑥ Wear the oxygen inhaler
As shown in the Figure, when using the ear hook type oxygen inhaler, adjust the position of the oxygen outlet and align it with the nostrils; when using a snuffing oxygen inhaler, please align the two outlets with the nostrils and tighten the rubber ring
⑦ Start the oxygen machine
Turn on the "power switch" and touch the "Start/Stop" key gently. Then, the machine will start to produce oxygen, and the user can inhale oxygen.Please adjust the oxygen concentration to the corresponding gear according to the practical situation. Recommended oxygen concentration: 70%~90% for special people (please do not inhale high-concentration oxygen unless otherwise advised by the doctor) The oxygen concentration of 50%~70% is suitable for the elderly and pregnant women, and 30%~50% is suitable for office workers and students, or please consult a physician.
Panel Display/Operating Instructions
Display description
1, Brand LOGO
2, Cooling fan fault alarm
3, Timing time
4, Oxygen flow display
5, Oxygen concentration display
6, SOS key
7, Anion function key
8, Timing - key
9, Timing + key
10, Flow adjustment key
11, Start/Stop key
12, Cumulative time display
13, Sleep mode display
14, Fan working display
15, Anion working display

Turn on the power switch, enter into ready mode, and the display screen shows "Brand Logo" and "Start/Stop" key.
Start/Stop key
Touch the "Start/Stop" key gently, and the machine will enter the oxygen production state and anion working state, and there is blue light displayed for the water tank. At this time, the oxygen concentration value shown by the display screen gradually rises to the corresponding value of the flow gear.
In the working state, touch the "Start/Stop" key gently to enter the ready mode, and the fan will be stopped 3min later.
Flow gear key
Touch the "Flow gear" key gently to adjust the flow. The oxygen concentration value changes with the gear, and the greater the gas flow is, the smaller the oxygen concentration will be. There are eight (1-8L/2-9L) flow gears, corresponding to oxygen concentration values of 90%, 70%, 60%, 50%, 45%, 40%, 35% and 30%. Restart the machine in ready mode, and the set value of the flow gear when the machine is shut down will be retained.
DE-1S/DE-1SW gears are: 1L, 2L, 3L, 4L, 5L, 6L, 7L and 8L. If the machine is started when the power is off, the flow value is 1L by default
DE-2S/DE-2SW gears are: 2L, 3L, 4L, 5L, 6L, 7L, 8L and 9L. If the machine is started when the power is off, the flow value is 2L by default
Timing + key and Timing - key
Touch the timing "+" key gently to increase the timing by 15min, set it in one-way circulation mode, and set the max. setting value to 180min; after 3 seconds of no operation, the countdown starts until automatic shutdown. The operation of "Timing key is the same as "Timing +" key, and "000" indicates no timing.
Anion key
The anion function can work or stop synchronously with the system, or it can also be used as a single function. In the working or ready mode, gently touch the "Anion" key to disable the Anion function; and then gently touch the "Anion" key again to enable the anion function.
SOS key
In ready or working mode, press the SOS key on the panel (or remote control), i.e., "One Touch SOS" key for broadcasting the voice message that "I need help" to help users, and press the "One Touch SOS" key again to stop the voice.
*To use this function, please keep the power switch on and the remote control sufficiently charged.
Warm tip: when operating the function keys, there will be different operations under different display brightness states.
1、 In the highlighted state, gently touch the function key to directly reflect the operation result.
2、 In power saving mode, gently touch the function key once to activate the highlight mode, and gently touch it again to stop the operation. Every time you touch any key, the buzzer will sound. It will enter the power saving mode one minute 1 min later in case of no operation.
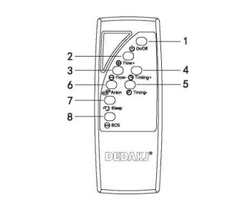
Instructions for Use of Remote Control
Operation Instructions for Remote Control Keys
1、 Start/Stop key
2、 Flow + key
3、 Flow - key
4、 Timing + key
5、 Timing - key
6、 Anion function key
7、 Sleep mode key
8、 One Touch SOS voice
Sleep mode key
In the working state, press the "Sleep" key, and after the "Sleep" icon on the display screen flashes three times, the display screen switches to sleep mode. When you press any key or touch any function key on the panel, the screen will be highlighted again.
One Touch SOS voice
In the ready or working mode, press the "One Touch SOS" key, and the voice message that "I need help" will be constantly broadcast to help the user seek help until the "One Touch SOS" key is pressed again to stop the voice.
The operation of other keys is the same as that of the host machine.
Characteristic Function
Power saving mode
In the working state, the display screen will enter the power saving mode after one minute without operation, and its brightness and the brightness of the water tank light will decrease synchronously, which will make your life more environmentally friendly.
Sleep mode
In working state, press the "Sleep" key on the remote control, the brightness of the display screen of the host machine will be further reduced than that in the power saving mode, and the water tank light will be off, making the sleeping environment more comfortable for you.
Cumulative time function
This machine is designed with the function of accumulative use time. After working time reaches one hour, the cumulative time will be increased by
Automatic fault testing function
This machine has the automatic fault detection function so that you can understand the fault more clearly. Fault detection of cooling fan: in case of a fault of the cooling fan during use, the display screen will display a flashing red fan icon, accompanied by a buzzer alarm sound.
One Touch SOS" function
Press the "One Touch SOS" key on the remote control, and the voice message that "I need help" will be constantly broadcast to help the user seek help until the "One Touch SOS" key is pressed again to stop the voice.
To use this function, please keep the power switch on and the remote control sufficiently charged.
Anion function
The system will enable the anion function automatically after start-up. The user can enable or disable the function independently as needed without affecting oxygen production. In the working state or ready mode, gently touch the "anion" key to disable the anion function, and gently touch it again to enable it The anion concentration of the machine is >8 million/cm3, which makes your ambient air more fresher.
Oxygen inhalation by two persons
As shown in the Figure, connect the oxygen inhalation tubes for two persons, and then they can inhale oxygen at the same time.
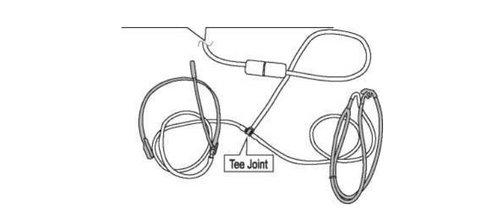
Connection Diagram of Oxygen Inhalation Tubes for Two Persons
Atomizing purpose (applicable to DE-2SW only)
1、 Before start-up, screw down the nut of atomizing port anticlockwise.
2、 Connect one end of the tube to the atomizing port. Please use it as needed or under the guidance of a professional doctor, and wear the atomizer as required.
3、 For start-up, press the "Start/Stop" key. Please confirm that the gear is set to (DE-2SW) 2L flow, and the oxygen machine will switch to atomizing purpose.
* After atomization, please press the "Start/Stop" key to shut down the machine, remove the atomizer connecting pipe, and re-install and tighten the atomizing port nut.
Maintenance
Clean the housing
The housing surface shall be cleaned at least once a month. First, cut off the power supply and wipe it with slightly wet clean and soft cloth soaked with disinfectant, and prevent the liquid from seeping into the bottle of the machine.
Clean the water tank
To keep the water tank clean, fill the water tank with pure water, distilled water or cold boiled water, and try to replace it every day.
- The water tank shall be cleaned once a week. First, shake and wash it with detergent, and then rinse it with clean water to ensure the hygiene when using oxygen.
Clean or replace the filter and filter cotton
The "white air filter" behind the frame can reduce noise, isolate dust and purify air. The cleaning and replacement of the filter is very important to protect the compressor and molecular sieve and prolong the service life of the oxygen generator, so please clean or replace it in time.
Do not operate the oxygen concentrator when the filter or filter cotton is not installed or is wet, or it will damage the machine for a long time.
Filter: generally, clean or replace it every 100 hours.
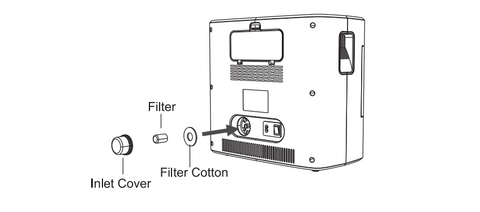
- Disassembly
It is located on the back of the machine; pull out the inlet cover outward and take out the filter directly.The actual cleaning or replacement time of filter and filter cotton shall be determined according to the actual service time and environmental impact. If the filter is dirty and blocked, it shall be cleaned or replaced immediately no matter how long it is used.
Note: as consumables, it is recommended to replace them regularly.
- Cleaning
clean it with light detergent, rinse it with clean water, and then install it on the machine after it is fully dry.
Clean the oxygen inhaler and atomizing components
They shall be cleaned once after each use. The nasal aspirator on the snuffing oxygen inhaler shall be cleaned and disinfected after each use: soak it in 5% potassium permanganate solution for 5min, and then clean it with clean water or wipe it with alcohol. It is recommended to regularly replace the oxygen inhalation tubes and atomizing components as consumables.
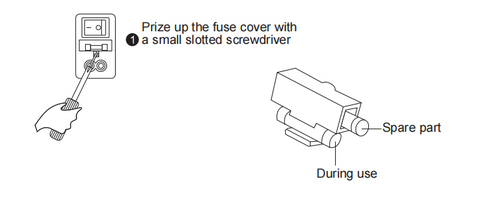
Replace the fuse
After confirming that the power line plug is pulled out of the power socket, pry the fuse cover with a slotted screwdriver (as shown in the appearance diagram), take out the invalid glass fuse tube, install the new glass fuse tube, and install the fuse cover back into the socket.
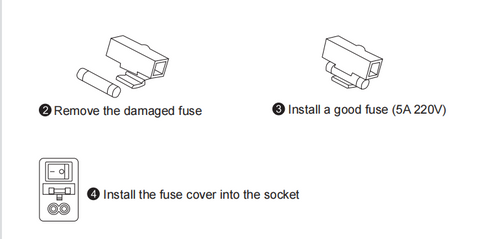
2, Remove the damaged fuse
3, Install a good fuse (5A 220V)
4, Install the fuse cover into the socket
Handling for idle for a long term
Please do the following work before keep the oxygen generator lying idle for a long term.
1,Remove the humidification water tank, pour out the water in the water tank, air-dry it, and install it back in place.
2, Cut off the power supply and retract the power line.
3, Do not store the oxygen generator in humid and dusty environment, avoid direct sunlight and pollution, dry and store the oxygen inhalation tube and oxygen inhaler at room temperature, do not bend the gas-guide tube, and keep out of reach of infants. Please make the following preparations before reusing the oxygen generator which has been idle for a long term.
(1)Check whether the power line is damaged.
(2)Clean the oxygen inhalation tube and oxygen inhaler, and check whether any is blocked or bent.
(3)Clean the humidification water tank.
Faults & Troubleshooting
Do not disassemble the machine if it still can not work normally after operation by the above method. Please call the customer service hotline for consultation.
CLICK HERE:
DEDAKJ Oxygen Concentrator
Official Site:
https://dedakjoxygenconcentrators.com/

DEDAKJ Oxygen Concentrator
Established in 1953, with ISO, CE, RoHS and PSE certifications, with medical oxygen concentrators and home oxygen breathing machines as the core, DEDAKJ is the top-rated oxygen concentrator supplier,offers the mini &small oxygen concentrator, household portable oxygen making machine, the medical grade 10 liter oxygen concentrator for hospital oxygen therapy &clinics oxigenoterapia. More The DEDAKJ Oxygen Concentrator store website offers the DEDAKJ original oxygen accessory oxygen parts & components. All DEDAKJ oxygen machine oxygen concentrators concentrador de oxigeno and original oxygen accessories parts can be bought here.
Buy online the best quality portable oxygen concentrator in DEDAKJ oxygen concentrator store.
Buy DEDAKJ Oxygen Concentrator: https://dedakjoxygenconcentrators.com/